Incorporating Compost
I was getting ready to plant some seeds and noticed that the soil level in one of the garden beds had sunk down about 2" over the winter. The soil was nice and fluffy and I could have planted there after I pulled the weeds, but I saw that I still had quite a bit of compost left and decided to incorporate it into that garden bed.
Below, is a picture of the finished compost. It looks like wonderful soil. It always amazes me when I think that just last year it was a pile of leaves, vegetable trimmings from the kitchen and a little bit of soil layered in . Almost nothing was recognizable from the kitchen waste! Banana peels, onion skins, orange peels, corn cobs... all had become soil. I spied an avocado seed, picked it up and easily crushed it! The compost also had plenty of earthworms in it! Yay!
If you look closely you may be able to identify avocado seed, peanut shell, eggshell, corn cob and avocado skin in the compost!
I dug an 8' long trench in one side of the bed, piling the soil up onto the other side of the bed, and then laid the finished compost into the trench. Then I raked the soil back over the top of the compost and used the shovel to turn it all over a bit... mixing the compost in with the soil.
Below, is a picture showing the compost and soil being mixed together in the trench. The blade of the shovel is at the lower right portion of the picture. You may see avocado skin, peanut shell and eggshell also!
I dug a second trench in the other side of the bed and piled the soil from that trench on top of the area I had just finished. I laid in more compost into that trench and repeated the process like the first side of the garden bed.
Then I raked it all smooth and it was ready to plant!
I planted Cherry Belle radish, German Giant radish, Mesclun Mix lettuce, Reflect Spinach and Detroit Red beets. I followed the instructions on the seed package with the planting depth and row spacing.
Then I labeled each row with the name of the vegetable and the date planted.
I have never planted German Giant radishes before! The Pinetree Garden Seeds 2013 seed catalog description says, that it is an heirloom variety from Germany. "It retains its high quality from the size of a marble to the size of a cue ball (or larger). It does not get woody or spongy, and rarely splits, handling drought-like conditions well. Scarlet skin and white flesh is crisp and mild at any size." I can't wait!!!
Two days later I realized that I should have had the tomato, pepper and squash seeds started indoors. So I got busy with that!
Planting Early Girl and Indigo Rose tomato, Coyame Jalapeno pepper, Horn of Plenty yellow crookneck squash and Sweet Mama winter squash.
I used a seed starting soil mix purchased from the local home improvement store and some peat pots that I found at the dollar store. I put the soil in the peat pots and followed the directions on the seed packet for depth of planting.
I labeled each pot, placed them in a tray and watered them with a fine mist, soaking them all the way through. Then I set the tray in the sunshine. Since the outdoor temperatures are still in the 40's at night, I bring the tray into the house every evening, and set it in an area that is warmer than the rest of the house. I take it back out every morning when I am sure that it will be warm and sunny. Tomato seeds will sprout in slightly cool soil, but pepper seeds are more finicky. Peppers really need the warmth in order to sprout and grow well.
Update on Super Sprint Snap Peas, Cherry Belle Radishes and Rhubarb...
We have had a ten days of warm and dry weather! I have watered the garden twice and sometimes three times each day. Once in the early morning and once in the early evening, with an optional watering at noon. The warm temperatures and watering has really caused the seedling to grow.
Here is an update picture of the Super Sprint Snap Peas.
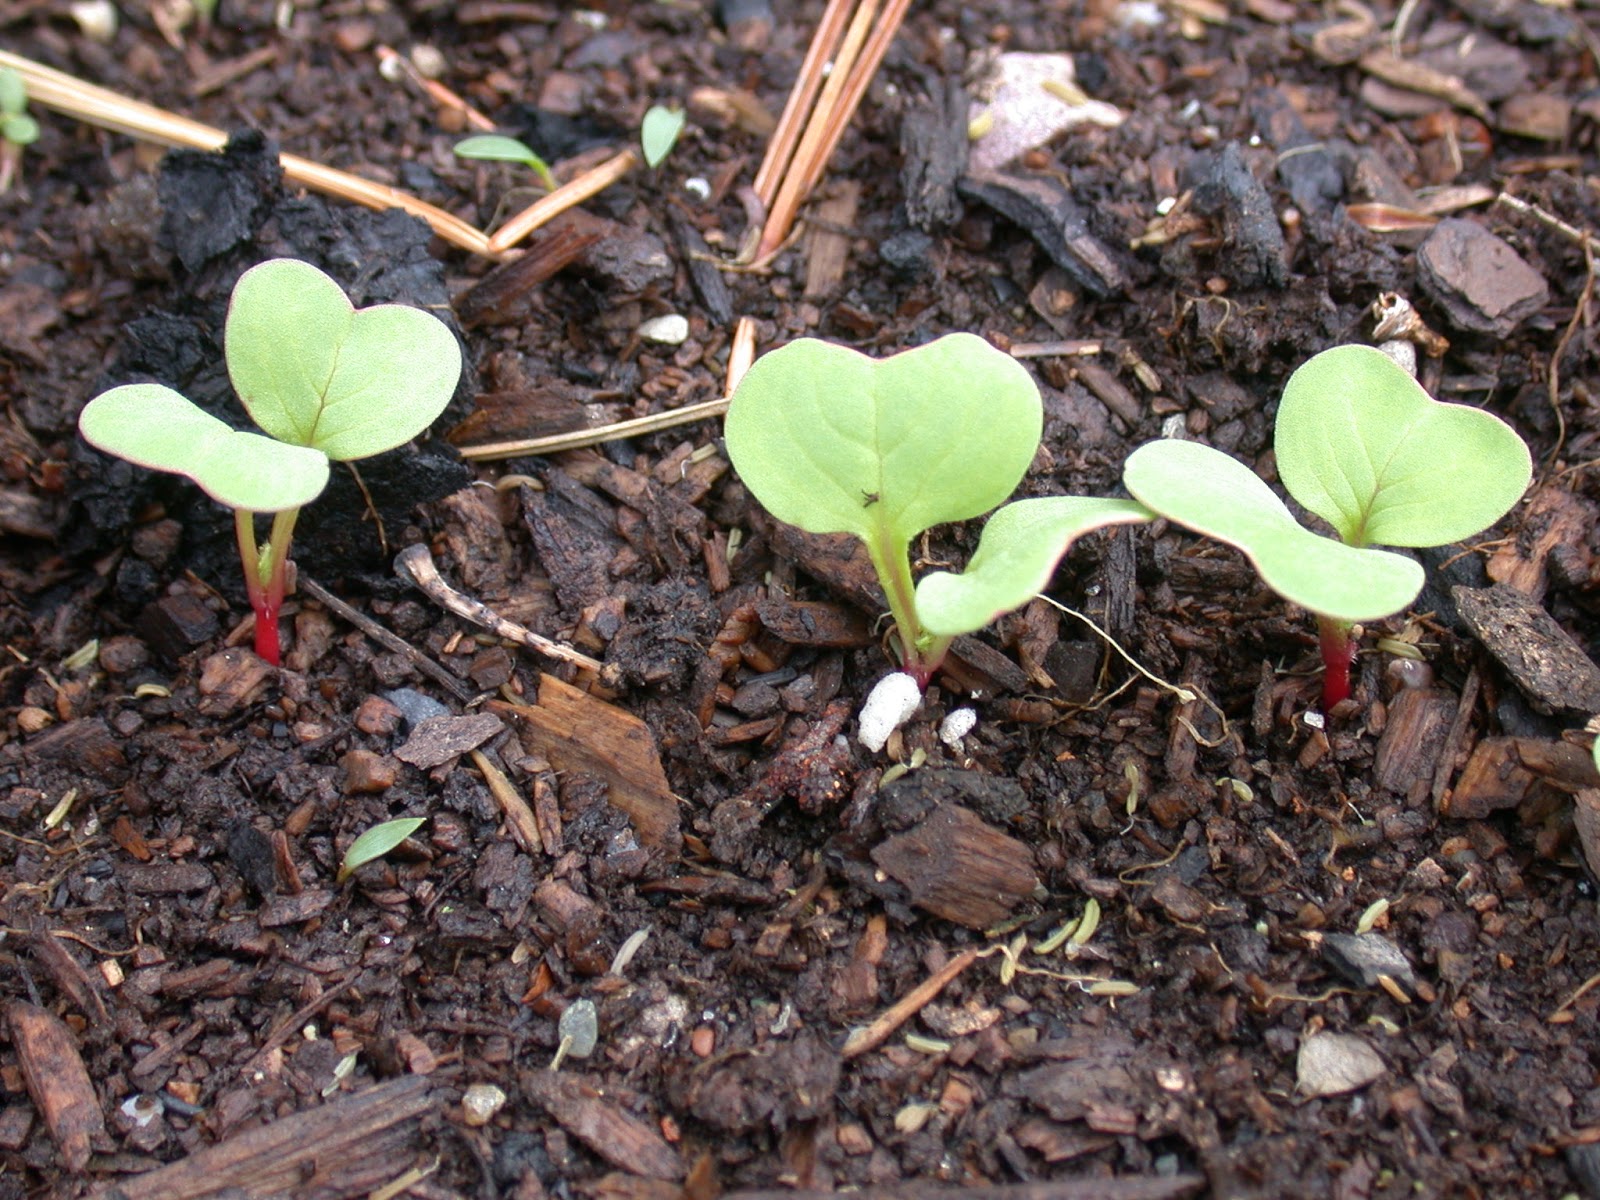
An update picture of the Cherry Belle Radishes showing their first true leaves.
An update picture of the rhubarb, which has really shot up!
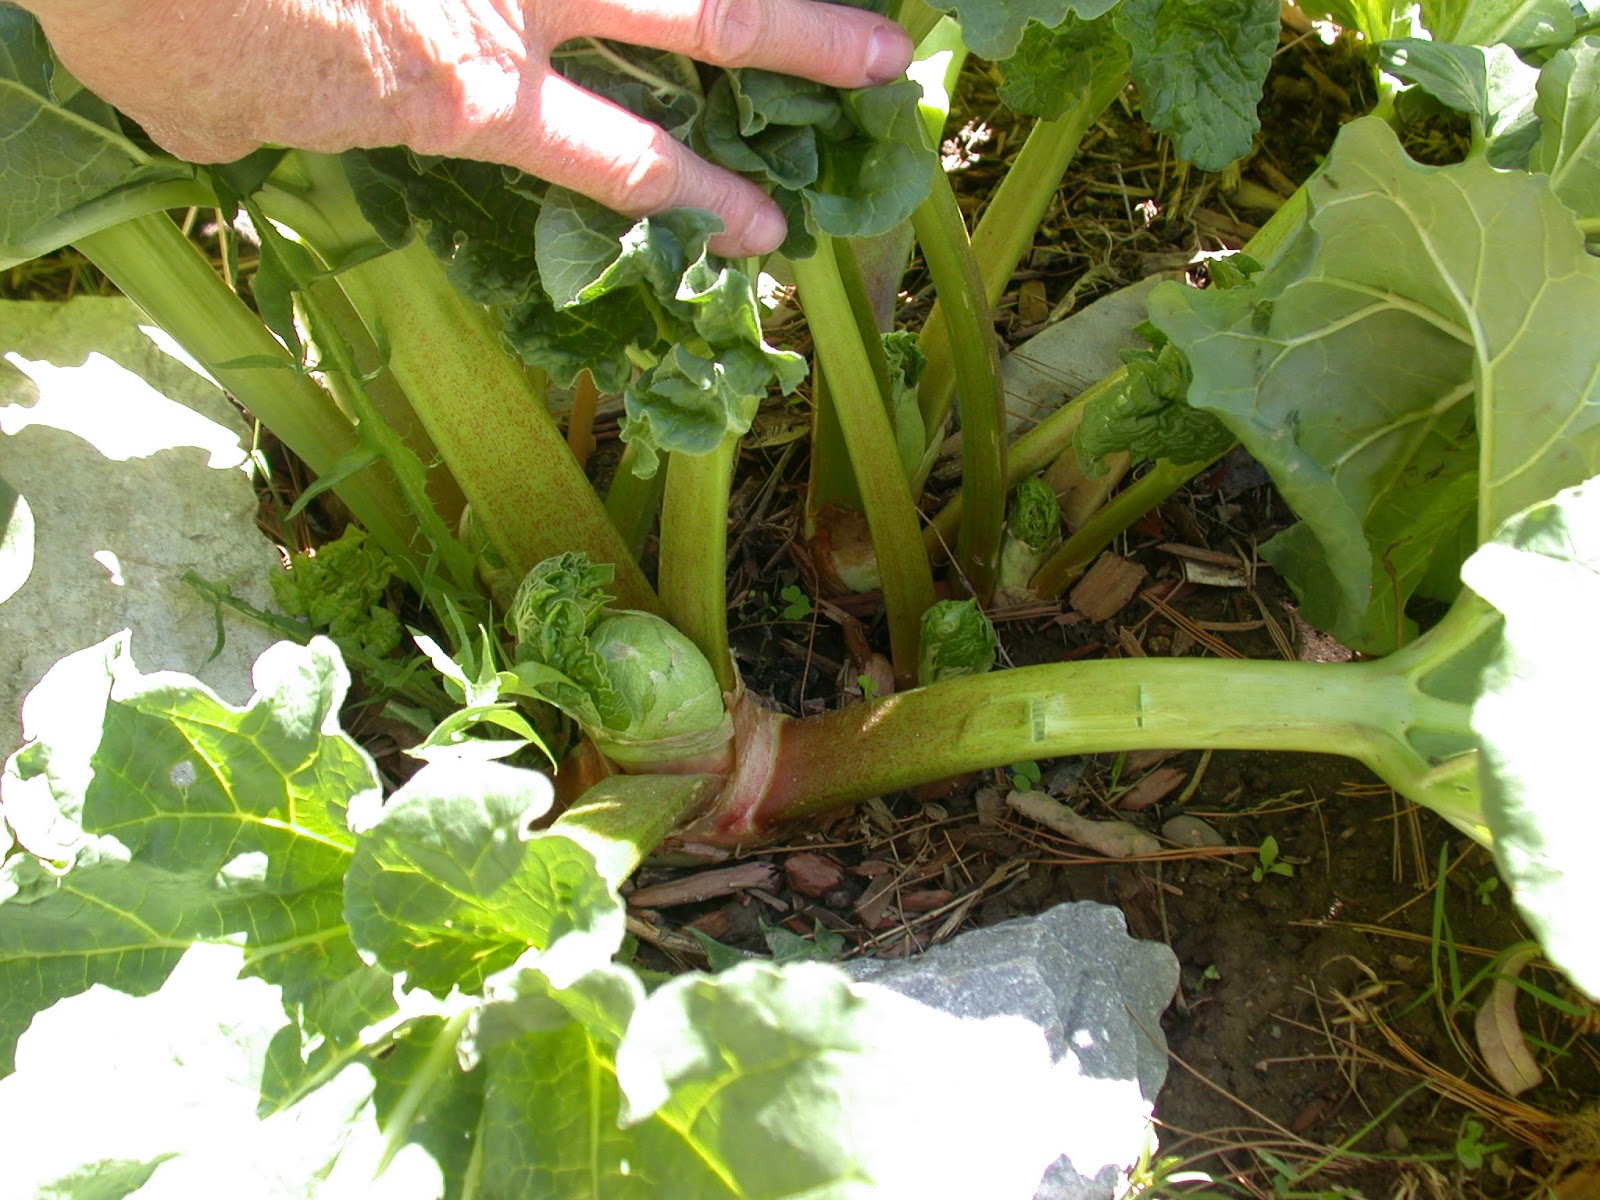
And a picture underneath the rhubarb leaves showing the different growing heads.
I could divide this one rhubarb plant into five or six plants this fall!
Stay tuned!
.JPG)

.JPG)
.JPG)


.JPG)
.JPG)

.JPG)
.JPG)


