Showing posts with label This Girl Gardens. Show all posts

Tuesday, July 7, 2015

Constructing Potato Boxes


Or... How I Built A Potato Planter Box

Potatoes are really fun to grow.  It is always so amazing to me that from a few small "seed potatoes" a whole basket full will develop.  All summer long the potato plants grow above ground and the new tubers develop, hidden, underground.  I wanted to plant potatoes because, if for no other reason, I look forward to harvesting them.  It is like digging for treasure!  Also, of course, freshly dug potatoes are so delicious!!!

Potatoes need a soil that has good drainage so that the tubers don't rot.  They also need a deep soil so that there is plenty of room for the tubers to develop. As I have stated previously, the soil in my yard is mostly clay and rocks, a combination which is not great for growing potatoes.  So, some sort of "raised-bed potato-planter-box" was in order!

Since I had decided to go with wooden framed raised garden beds, I wanted a potato planter box that would look similar to the wooden frames that I was using for the rest of the garden.  I know that as the season progresses I will have to "hill up" the potato plants....add more soil to encourage more potatoes to form underground.  I envisioned the potato planter box would start out as a shallow frame, and then I would add on another shallow frame on top of the first one and perhaps another shallow frame on top of the second one, etc.  The frames had to fit one on top of the other securely so they wouldn't topple or tip over.  I also remember that in the Fall when I dig the potatoes up, I'm going to have to take this potato box apart.  So, the finished box layers needed to be sturdy, fit together well, yet be lightweight, and easy to take apart.    

I searched on the internet for ideas.  In the end, I think I combined several different ideas for my potato planter box.

It took me a while to figure out the materials that I would use.  I settled on unfinished 6"X6' cedar fencing.  I also used 4" pieces of 2"x3" pine to secure and support the corners.


I cut the cedar fencing in 3' lengths.
I also cut the 2"X3" lumber into 4" lengths.

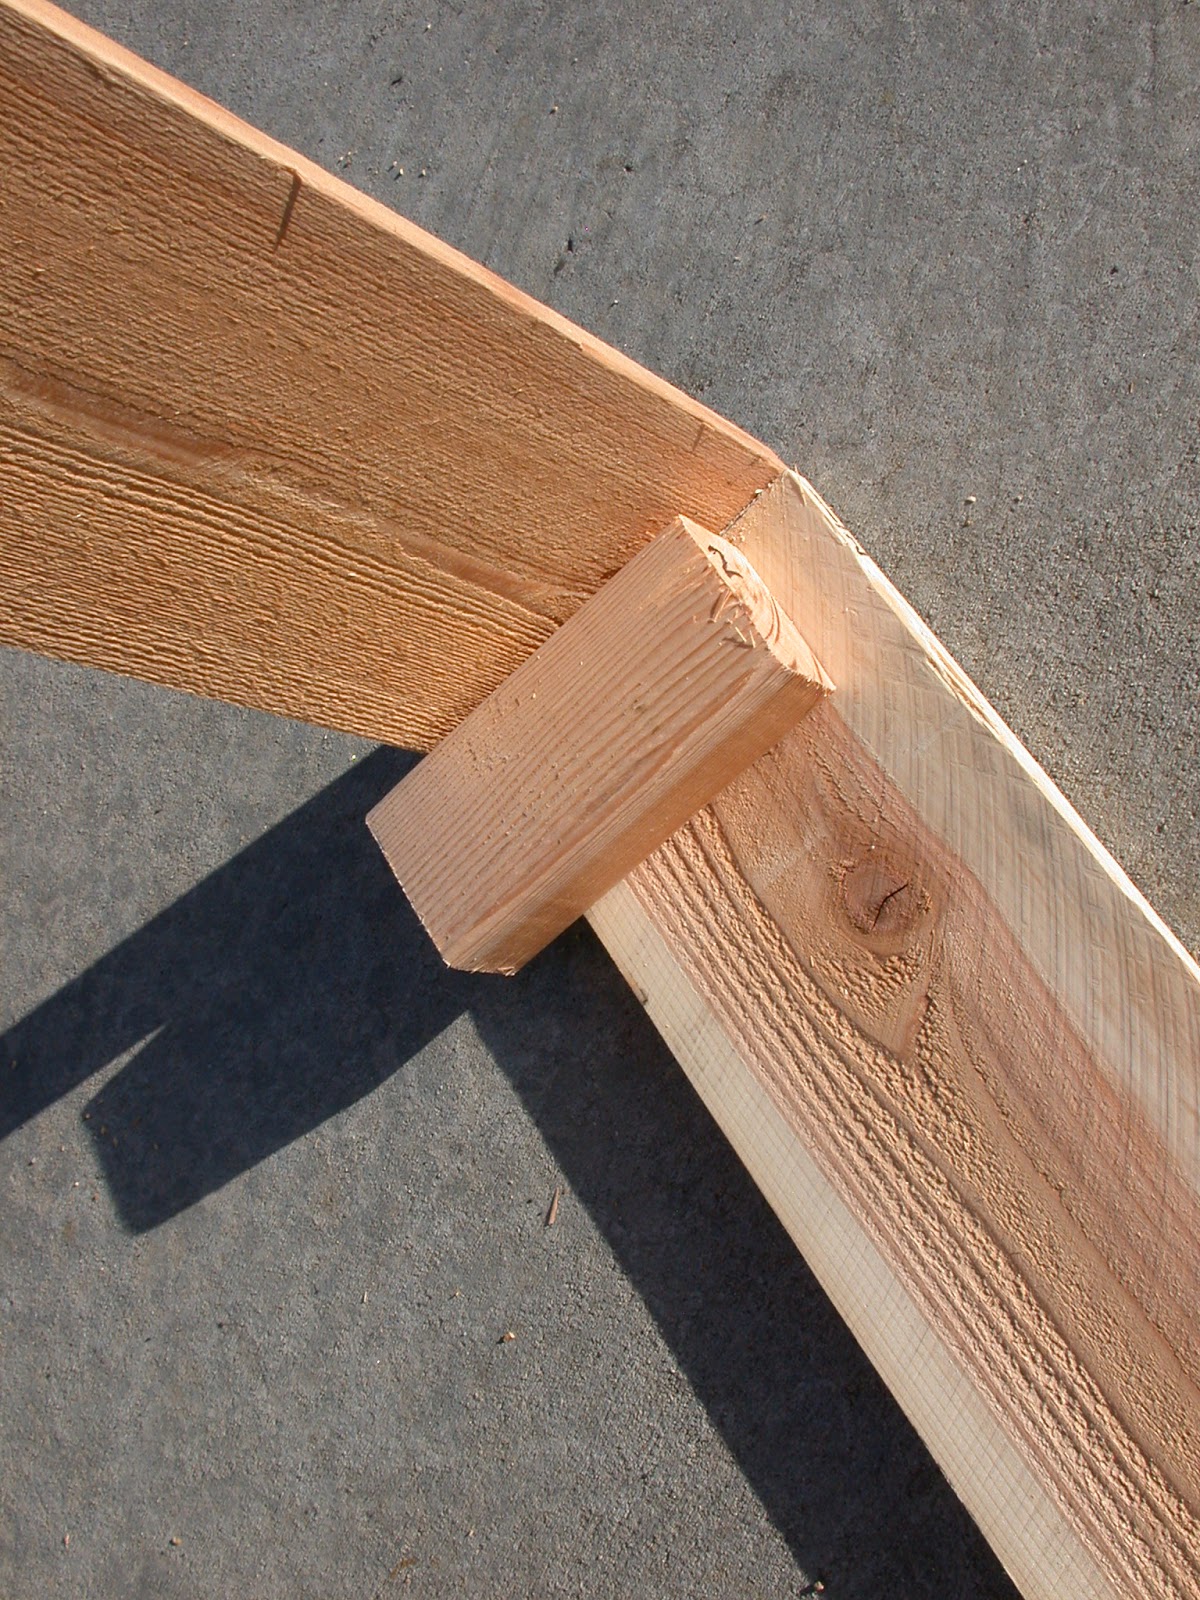
I drilled pilot holes.


And then fastened the corners together with screws.

The bottom frame looks like this.  It sits flat on the ground.
The corner supports are offset from the top edge so that
the second frame will fit snugly on top.


On the second frame, I fastened the corner supports so that
they would extend down into the first box.


I made sure that the two frames would fit on top of each other.

Like this.  


Then I made a third frame to go on top of the second one.  


And I made sure that it fit together well.


It fits!


Here is the finished potato planter box.  

You can see, in the picture below, that weeds grow pretty well in this rocky clay soil.  I did not want the excess water that I would use in growing the potatoes to encourage more weeds to sprout up through the potato planter box.  So, I first pulled all the weeds in that area.  Then I raked it smooth and laid down a layer of pavers with landscape fabric underneath.  
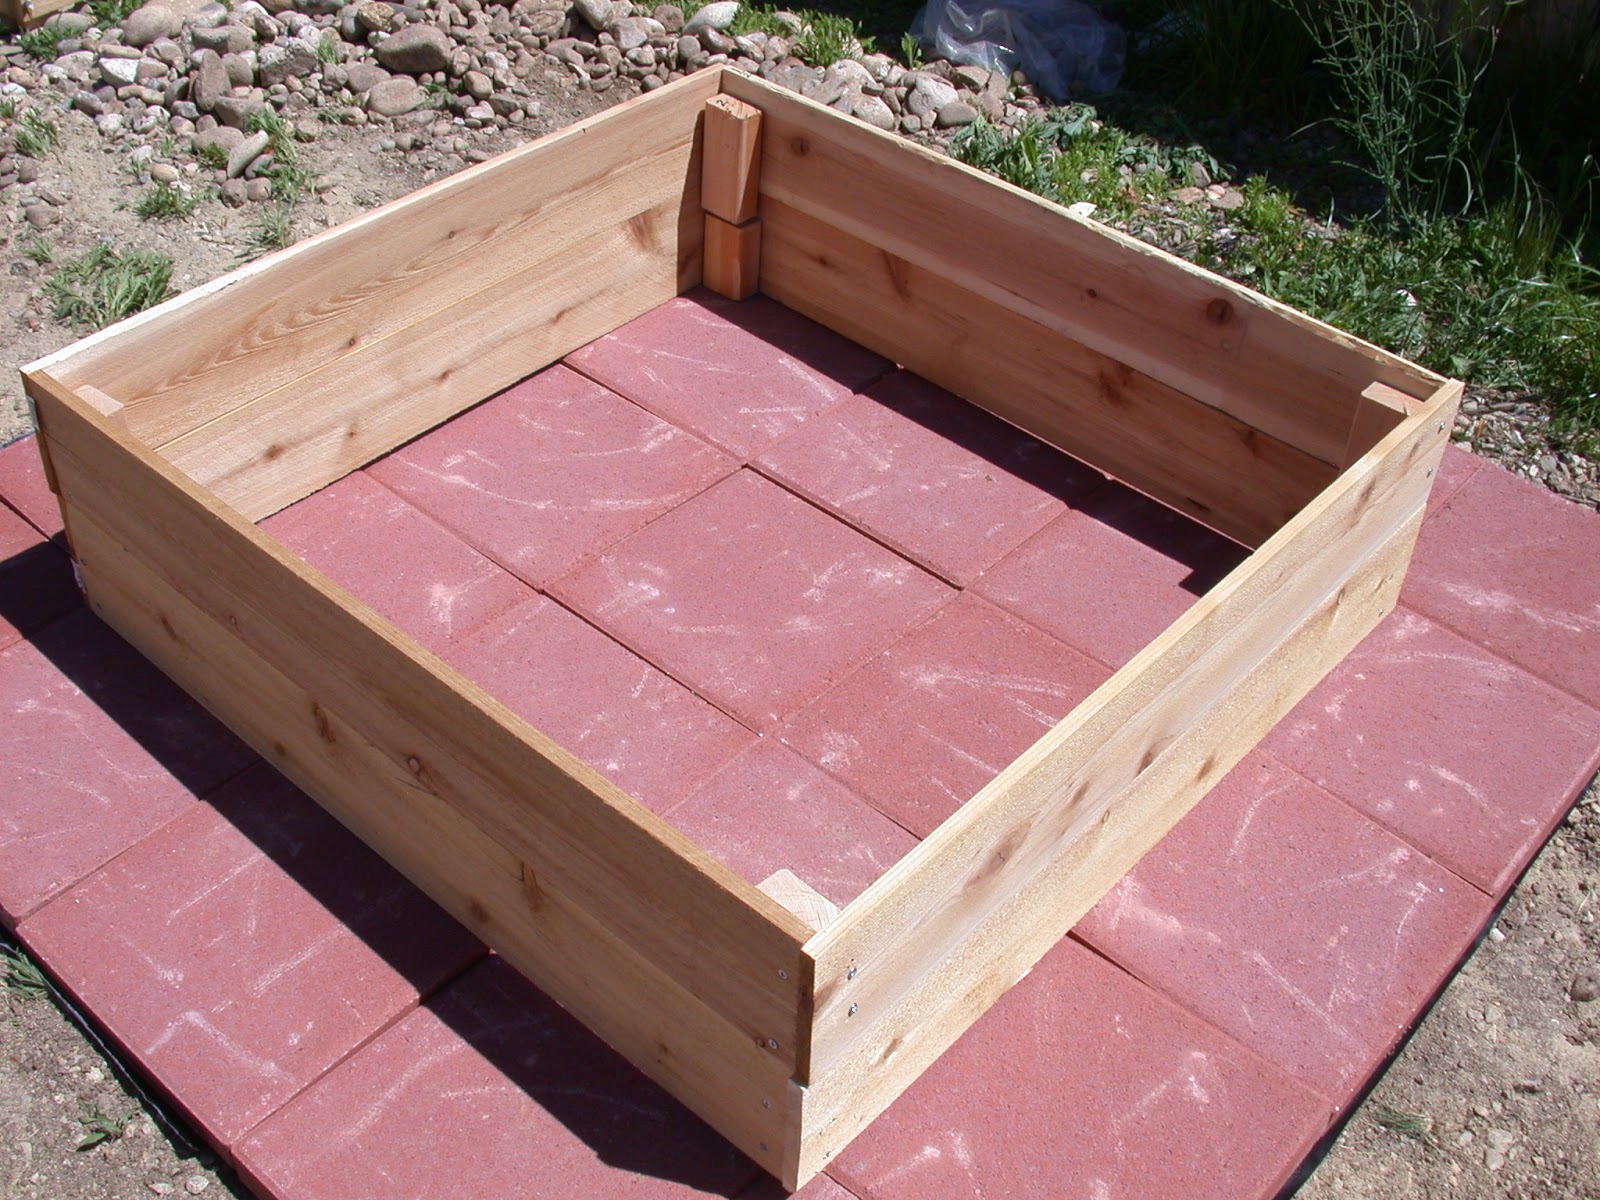
I put frame #1 and #2 in place on the pavers.

I put in some of the soil from that huge pile of soil that I had purchased.
You can see frame #3 in the background.  

I made a shallow trench and put the seed potatoes in the trench.

I covered the seed potatoes with soil.
  
I raked the soil smooth, and I watered it gently
until the soil was good and damp.


I watered the soil every day.
Two weeks later, the potatoes are coming up!


I am looking forward to freshly dug potatoes in the Fall!


Tuesday, June 2, 2015

Re-framing the Garden

Yes, it is June 1.  Warm weather has arrived and I am lagging behind on my gardening.  After much deliberation and much physical effort digging out and removing rocks, stones, boulders and building debris, I finally decided that it would take me years and years to dig garden beds and develop a good/deep soil profile.  Several friends had suggested that I simply build wooden frame raised garden beds like I had in Vermont.  Initially, I did not want to incur the expense of buying the lumber and then the soil.  However, I realized that I was already purchasing some garden soil, compost and peat moss by-the-bag and it was costing me quite a bit to do that.  So, I bit the bullet and bought some lumber, had a dumptruck deliver some garden soil, and began constructing my garden beds.

Six cubic yards of garden soil (70%) mixed with compost (30%).  

I had thought that I would make my garden beds 4'X8'X6".  When I went to Home Depot to purchase the lumber, I found that they were out of 4'x8' lumber.  As I stood there contemplating "Plan B" (I didn't have one), the nice young man who had told me they were out of 2"x6"x8" boards told me that he would substitute 2"x6"x10' lumber for the same price!  Not one to look a gift horse in the mouth, I immediately knew what my Plan B was, and decided that my garden beds would be 4'x10'.  

It seemed a simple matter, but as I looked over my yard I could see that the yard was actually a trapezoid and not a rectangle as I had thought.  The trapezoid shaped yard was creating a lot of puzzlement in my mind.  Everything seemed very uneven.  Those who know me will appreciate this "dilemma".  Should I run the beds parallel to the fence or to the patio???  What would I do with the little leftover triangle-shaped beds that would result from either plan?  I measured and graphed everything out on paper and sketched out several different plans, and finally decided on this one.


2015 garden plan - second iteration

I ran a string to indicate the line that would parallel the fence.  After sawing lumber and drilling pilot holes so that the boards would not split, I began to assemble my garden beds.  Then I placed them along the line and made sure that they were straight.  


Beds are aligned along the green string.  


Then, I lined the beds with corrugated cardboard (leftover boxes from my recent cross-country move).  Then I filled each bed with the soil.  You may recall that I already had broccoli, peas, radishes and tomatoes planted.  Of course the previously planted beds were off center and out of line with my new plan!  I took the row cover off and admired the broccoli, radishes and peas.  Beautiful plants.  


The row cover not only insulated the plants from freezing temperatures, 
but it kept the insect pests away! 


I could also see how far "off" the bed was....


I did not want to disturb the plants, if possible.  I only had to dig up a few of the broccoli plants, align the beds, fill the beds with soil and transplant the plants into the newly aligned beds..  
  
I know my rows are slightly angled, but this is a temporary situation as the broccoli, radishes and peas will soon be harvested.  Once I plant the next crop, I will have straight rows once again. 

I used this opportunity to thin the radishes!


A convenient benefit that I had not realized would happen, is that my row covers fit the ten-foot long bed.  The concrete reinforcing wire which I use as the framework of my row covers is five feet long.  So two row covers laid end to end, fit perfectly inside the ten-foot long bed. 


Row covers are back on.  They fit perfectly


This process took me about two weeks.  


Friday, January 2, 2015

Fall Harvest, November Snowstorm and a Long Winter's Nap.


The garden did fairly well for the length of time that I actually had spent gardening. 


I had a few harvests of squash and tomatoes in late September and early October.  The peppers and tomatillos I had planted did not produce anything.  I think it was because I did not get them planted until it was too late in the season. 

Pictured below:  (Clockwise, from top left) Yellow Crookneck summer squash, Buttercup winter squash, Cherokee Purple tomato, Early Girl tomato.                                                                                                                                                                     


Frosty nights were predicted, and as I hadn't picked all the produce, I took precautions by covering the tomato and squash plants every night with some old quilts.  With a quilt covering, the frost nipped the plants but did not kill them.  Warm days returned, I suspended the nightly quilt covering, and I continued to harvest a few more squash and tomatoes.  

The harvest finally ended when we had a snowstorm in mid November.  Nine inches of snow fell and that killed the garden.  I was really regretting that I hadn't simply cleaned up the garden in October! 


Luckily, the weather warmed, the snow melted away, and I was able to do the garden cleanup.  I pulled out all the dead tomato and squash plants and put them in the compost pile.   Then I dug up the soil and raked it all smooth so that it would be ready for planting in the Spring.


More snow arrived on Christmas to blanket the garden, and now it is truly tucked in for the winter!


Saturday, June 29, 2013

Strawberry Hunting

As I mentioned previously, we have had a lot of rain.  My informal rain gauge is a 5 gallon bucket from Lowes Home Improvement Center.  I just leave the bucket sitting out in an open area of the yard.  Open area means, no tree branches overhead.  Every day, when I go outside, I check to see how much rain has fallen since I looked the day before.  Nearly every day, for the last month and a half, I have emptied 1/2" to 1" of water out of the bucket!  That is quite a bit of rain!


.  
Also, I mentioned previously that the rain has really made the garden grow.  This has done a great job for the vegetables.  It has also contributed to the lush green growth of the weeds!  As you can see from the next picture, the weeds have taken over!  One can hardly tell the difference between the radishes, lettuce and the weeds in this bed!


As I was gazing at this mess, I noticed something red in amongst the weeds of one of the raised beds.  

Oh. My. Gosh.  

Could it be true?  Might it be a strawberry at last?  Yes!  Hidden down in the weeds I found a large strawberry with two others developing next to it!  


Last year, with high hopes and big plans, I set out 50 strawberry plants in two 8' x 4' raised beds.  They really did not do very well.  Alot of them just died.  I had grown strawberries successfully in Texas, Washington, Idaho and Nevada.  I wondered if maybe there was some secret to growing them in Vermont!!  

Over the winter even more of them died.  I speculated that I should have mulched them to protect them from the severe cold.  

This Spring I found that the ones that survived were the new starts that had sprouted from runners which the mother plants had sent out into the bark-mulched garden paths.  

I transplanted all of those wanderers (about twenty plants) back into one 8' x 4' bed.  They seemed to do well, and quite clearly the rain has done wonders for those strawberry plants. 

Further hunting rewarded me with one dozen of the beauties!  Oh Yum!  What a treat.... one dozen organically grown, freshly picked, super sweet strawberries!


Have a nice day!